RESOURCES
When preparing the planting hole, always use a good quality compost, such as Gardner & Bloome Soil Building Compost or mulch to mix with the existing soil. Even with the good topsoil, it is good to amend the soil with compost or mulch.
Dig the hole the same depth and slightly wider than the root ball of your tree. The tree should sit a little higher than the finishes grade so that the tree trunk flare is not covered over by soil. Set the tree in the hole to the correct depth. Carefully cut the twine on the top of the root ball and unravel the burlap from around the trunk of the tree. You can push the burlap down inside the hole and bury it.
Do not disturb the original clay root ball as that will disturb the roots.
Sprinkle a quality fertilizer to support root growth, such as Dr. Earth’s Starter Fertilizer. Backfill with the amended soil to the same depth as the original native soil the tree was grown in. Water the tree regularly for the first couple of years until it is well established and maintains irrigation as the weather requires. A couple of inches of organic mulch will assist in training.
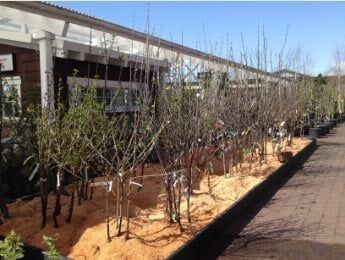
Bare-root plants are significantly less expensive and typically include deciduous trees and shrubs, such as roses and fruit trees, but also included strawberries, rhubarb, and other dormant fruit. This is an affordable approach to establishing or adding to your existing garden, be it edible or ornamental. The young plants are harvested while dormant and are eager to grow in your garden. In the nursery, their roots are kept moist and heeled into a mulch or saw dust-like medium. They are ready to be planted immediately upon purchase, but if you are not able to do so, the roots should be kept moist and heeled into a mulch at your home before being planted in their new garden space.
Soak your plant roots in a bucket of water for at least two hours. Dig a hole about 18″ wide and deep. Mound up a mixture of compost and native soil at the bottom of the hole. The plant roots will sit up on this mound. Sprinkle a quality starter fertilizer, like Dr. Earth Starter, around the roots at planting time to get your bare-root plants off to a great start. Backfill the hole with a mixture of compost and native soil. Make sure that if your plant is grafted that the graft union is above the soil line. Water in thoroughly to be sure there are no air pockets. If you are planting roses, they are heavy feeders and a quality rose fertilizer, such as Dr. Earth Rose & Flower Fertilizer is good to apply regularly during the spring and summer. If you are planting fruit trees, apply Dr. Earth Fruit Tree Fertilizer regularly during the spring. This organic slow release fertilizer will encourage robust growth and a thriving garden.
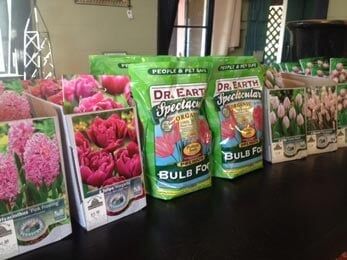
Plant spring blooming bulbs in the fall with choices like tulips, daffodils, hyacinth, muscari, and alliums to add color and interest to our spring landscapes. Plant summer blooming bulbs in the early spring, such as dahlias and lilies. From small to tall, they are a low maintenance choice for landscapes as well as containers. Consider tucking in a few in your containers now to emerge through the foliage in spring.
Most spring and summer blooming bulbs prefer full to partial sun exposure to thrive and set beautiful blooms. They appreciate fertile, moderately moist, but well-draining soil. Remember to add Dr. Earth’s Bulb Food to nourish them as they grow and keep them coming back.
When planting your bulbs, dig the hole to the proper depth for the type of bulb you are planting. If you are not sure what the depth is, the packaging will tell you. Use Bulb Fertilizer in the planting hole. Plant bulbs with their bottoms down and their tops up. If you are having trouble telling which is which, you can plant them on their side and they will find their own way. Give them a good watering to encourage their root development.
Do you have trouble with the squirrels digging up your bulbs? Then consider planting daffodils (narcissus), as squirrels do not care for them. Some gardeners plant their bulbs in below ground cages or cover the soil surface with a wire mesh to deter the squirrels from harvesting their bulbs.
Some bulbs can also be forced indoors. Fragrant bulbs, such as hyacinth and narcissus “Paperwhites,” are an excellent choice for bringing the beauty of nature indoors. They can be planted in soil or forced in stones, glass beads, or whatever approach you take will work as long as the base of the bulb is not sitting in the water. The bulbs should instead be perched just above it.
Potatoes
Potatoes are not frost hardy, so you should wait until the frost is behind us, usually mid to late March. Pick a site that is sunny and has good soil. Till the soil and add organic fertilizer. Potatoes thrive in well-drained, loose soil. Traditionally potatoes are grown in rows. The potato 'seeds' are planted every 15 in., with the rows spaced 2 1/2 to 3 ft. apart. If space is limited or if you would only like to grow a small crop of potatoes, you may prefer to plant one or two potato mounds. Each 3-4 foot diameter mound can support 6 to 8 potato plants.
You want the potato seed potatoes to rest upon reasonably moist and open fertile soil, and have the soil above them loose, airy and on the dry side. You can achieve this by barely covering the seed pieces at planting time and mounding compost over them as the vines sprout and grow. Keep mounding compost over the growing tubers so they are never in direct sunlight. The tubers form above the seed pieces and just below the sprouts.
Harvest time is after bloom. Final harvest is when the vines are completely dead and best when the soil is completely dry—something that is sometimes hard to do in the Pacific Northwest! If the rain just won’t let them dry completely, put them in the garage out of the weather for a few days. Most potato varieties store well, and should keep well for several weeks if stored in a cool, dry location. You can then enjoy them at your leisure.
Garlic
Spring and fall are the best seasons to plant garlic in the Pacific Northwest. To plant garlic you need a sunny location with well-draining soil. Divide the bulbs into individual cloves planting only the largest. There is no need to peel the garlic. Set cloves root end down 2” deep and 5” apart. A layer of mulch can provide protection from winter’s chill when planting garlic in fall.
Applying Dr. Earth All Purpose Fertilizer and a little bone meal in April will encourage the rapid growth of the leaves. Be sure to keep your garlic well weeded as the root structure is small and you don’t want it competing for water.
The foliage and stalk emerges and produce a flower bud. The tender stalks and flower buds are known as scapes, which can be harvested to encourage bulb development. The tender scapes can be sautéed and paired with your favorite savory accompaniments.
Harvest the garlic when the lower leaves start to die off in summer. You can clean the soil off the bulbs at this time and store it in a cool dry place to allow it to thoroughly dry and cure for 3-8 weeks to preserve it for months to come. Storing garlic with its leaves is best and braiding them is a convenient and attractive way to bundle the garlic while it is curing and it allows for easy access and use in your kitchen.
Growing garlic is easy and rewarding, opening up new varieties to explore and ways to enjoy its flavorful delights.
When pruning deciduous trees and shrubs remember to start with these simple rules: Remove Dead Wood and Broken Limbs.
Much can be accomplished by simply cleaning out all of the dead wood, then stepping back to see how your tree or shrub looks. We are often pleased to see the overall shape has improved greatly and our plat is refreshed.
Address Crossing Branches: Branches that cross or rub against each other can lead to injured bark or a fusing of branches. This is an opportunity for disease or pests to enter the plant. Gardeners must evaluate which branches should be removed. A good rule of thumb is to remove the crossing branch that is growing in a direction counter to what you would like, for example, horizontally, or other one that is thinner or weaker than the one it crosses.
Remove Diseased Areas: Branches that have disease present should be removed to prevent it from spreading. These should be disposed of in your trash rather than your compost bin. Your pruning tools should also be disinfected afterward to prevent the spread of the disease.
Thinning cuts are the ideal way to clean out congested trees or shrubs. Thinning cuts remove the branch to the primary growing point.
Heading cuts create a fuller, denser tree or shrub. This cut is often used to control the height of some shrubs and is used in formal hedging.
After all this, start to shape and structure your plants to your own personal aesthetic style. If you have a plant whose ultimate size is going to reach larger than you wish, be sure to prune every year. Avoid removing more than ⅓ of the living plant in a single year. Many flowering trees and shrubs should only be pruned right after they bloom, such as Lilac and Rhododendrons, if you aren’t sure when to prune in your garden you can always contact one of our experts.
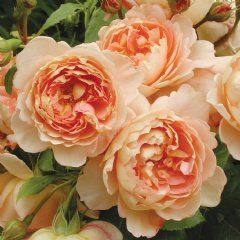
Mid to late February is the perfect time to start thinking about pruning your roses because you still need to see some warming temperatures. In fall, many of us will lightly prune our roses down when we do our garden cleanup. Now is the time to do the real cleanup: removing dead and spindly canes while removing any crossing branches. Remove any slender canes smaller than the diameter of a pencil. This will encourage the plants’ energy to be directed to the more robust canes. Be sure to always prune to an outside bud to maintain a nice open vase shape. If you take your rose down to 18 to 24 inches, you will still have a few inches you can remove if there is any winter damage from a late frost. This is also a great time to pull back some mulch from around your roses and apply your first application of Dr. Earth Alfalfa Meal or Dr. Earth Rose and Flower Fertilizer.
Hydrangea pruning is broken down into two main categories: those that bloom on old wood and those that bloom on new wood. Hydrangeas that set their flower buds in the previous year are called an “old wood” bloomer and those that set their blooms in the current year are referred to as “new wood” bloomers. As a general pruning rule, gardeners should always start with removing dead, diseased, or crossing stems; this is the only pruning that must be done for the health of the plant. This type of pruning can be done at any time, as well as the removal of spent blooms (deadheading). Deadheading cuts should be made to the first set of buds. It is not essential to prune hydrangeas annually, but if it has become too large or has developed too much old wood, it can be restored to its former vigor by using the pruning techniques outlined below.
Old Wood Hydrangeas
- Hydrangea macrophylla (Mop heads and Lacecaps)
- Hydrangea quercifolia (Oakleaf Hydrangea)
- Hydrangea serrata

Mophead and lacecap hydrangeas do not have to be pruned unless they are very old, in which case a rejuvenating pruning is very beneficial. Pruning this type of hydrangea all the way to the ground will remove all of the flower buds preventing them from blooming in the current growing season. Ideally, this task should be performed in late winter to early spring, after the threat of the last frost has passed. This will allow you to see the stems clearly before the foliage emerges.
Selective pruning can be done by removing the older darker stems that are no longer performing, allowing the shrub to regenerate and put its energy into new stems. In cases where a more radical pruning is necessary, you can prune it down to the ground leaving some stems for reserve in late winter or early spring.
- Hydrangea paniculata (i.e. H. PeeGee)
- Hydrangea quercifolia (Oakleaf Hydrangea)
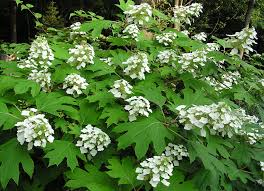
These hydrangeas bloom on new wood grown in the current season. Cut back these shrubs in late winter before new growth begins. They are forgiving if pruning is not done at that time as long as you avoid pruning when the flower buds are opening.
Leaving approximately 18–24″ stems behind when pruning to provide a sturdy base that will help prevent the flopping of the often heavy blooms.
***One exception to these two pruning categories: Recent introduction of Hydrangea “Endless Summer” that blooms on both old and new wood.
How can we reduce our impact and embrace gardening and enjoy our landscapes? How do we adapt and help our gardens to do the same? Some of the ways we can accomplish this is by increasing awareness about our growing environment: sun exposure, radiant heat, soil type and conditions, as well as how much water we are using and for what duration. It is also very important to select the right plant for the right place. Being an observer of your surroundings and learning about your own micro-climate will go a long way to growing a flourishing garden and bring you many seasons of enjoyment in your own personal oasis. Establishing a drought tolerant garden means, in part, assessing the conditions of your garden and adapting when necessary. Here are a few points to help you evaluate and better understand your own garden.
How much sun does your garden receive? At what time of the day does your garden receive the majority of sun—morning or afternoon—and what is the intensity of the sun? Are there reflective surfaces that are increasing the heat for the plants nearby? This can be a significant increase in not only the temperature but in the concentration of the heat on the plants which can lead to sun burned foliage. In contrast, are there trees or shrubs nearby that can help to absorb some of the heat, which will dissipate the strength of the sun for the neighboring plants? Here is a good rule of thumb to help evaluate the sun exposure in your landscape, based on the sunniest time of the year.
- Full Sun: 6 or more hours of direct sun
- Partial Sun/Partial Shade: 4–6 hours of direct sun
- Shade or Dappled Sun: Less than 4 hours of direct sun to the degree that you may have dappled or filtered light through large trees or shrubs.
It is important to note that a shady spot does not necessarily mean moist soil. Under the shade of a large tree is often quite dry with the roots of neighboring plants to compete with and the lack of rain coming in contact with the area due to the shedding of water around the drip line of the canopy. This area can be shady desert. This is just another piece of information to help you evaluate your own garden. There are many plant choices available to suit both moist shade and dry shade sites.
Most plant tags will inform you on the needs of the plant, but when in doubt our knowledgeable staff is always happy to answer any questions.
What is the condition of your soil? Is it heavy clay soil prone to holding water but also tending to dry to the point of cracking? This soil type can inhibit the roots from receiving sufficient aeration and can restrict the roots of your plants from accessing nutrients and moisture. If your soil is sandy, it is very quickly draining. This type of soil sheds the water and nutrients so rapidly that they are inaccessible to your plants. Our gardens thrive best in a balanced soil between the extremes of heavy clay and sand. A dark, rich, sandy loam contains the best of both worlds: water holding, yet moderately draining, nutrient rich soil, both available and accessible to our plants.
Do you have a layer of mulch around your plants? This can make all the difference between a dry plant and a dead one. Mulch acts as a layer of insulation, buffering the roots of your plants from desiccation. Plants tend to suffer less stress and can go for longer periods of time between watering than their counterparts who do not have the advantage of a fluffy layer of mulch around their base. Be sure to keep a few inches of separation from the base of your plant and your layer of mulch.
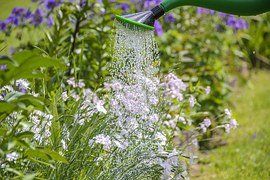
How much should we water and for how long? These are perennial questions with no clear cut answer. For those of us who do not live in areas of water restrictions to guide our usage, we should practice thoughtful observation of our gardens. Some areas will receive more sun than others and will likely need a bit more water than shadier locations. When the temperature spikes for long periods of time, we all struggle to stay cool, comfortable and hydrated. It is best to water our gardens during the coolest times of the day, morning or evening, when less of the water will evaporate. Always water at the base of the plant and not the foliage. This is where the plant drinks it in, through its roots. A good rule of thumb for assessing how much to water is to water for approximately 10–20 minutes and then scratch the soil surface to see how deep the water has penetrated. It can be quite a surprise to discover with water starved soil that it has only penetrated an inch deep, which is far too shallow to benefit the roots of the plant.
It is best to water deeply and infrequently to establish strong, deep root systems. Every garden is unique; you will know the right amount and the duration that is right for your garden by observing and testing your own site. It is also important to note that newly planted plants will need much more water and care while they are getting established in their new environment. This duration of time will vary from plant to plant and can take from one to five years. Again, we must put on our investigator’s hat and observe how they are doing. In general, a good rule of thumb for plants when they are getting established is watering them deeply every 3–5 days.
How do we choose the right plants for our little patch of earth? It starts by observing the conditions in our own space and learning about the nuances of each area. How long the sun is there and at what time of the day as well as the soil conditions as described above. Once you understand your space, you are better able to make informed choices about what will succeed in your garden. We will also be able to evaluate where our existing garden gems are on the spectrum of drought tolerance. Sometimes we are called to reassess our plant choices or placement. As gardeners, we sometimes test the boundaries, for example, by placing a partial sun loving plant in a full sun location. They show signs of drought stress or sun scald and we must water them several times a day . . . and so we must make a course correction and “rearrange the furniture” and place the right plant in the right place.
Another strategy that we can employ to help beat the heat is incorporating plants into our landscape that are well adapted to arid or dry conditions. Succulents/sedums, for example, have water holding capacity in their foliage and stems that act like a reserve to take them through the hotter, drier times. Native plants are uniquely adapted to our climate and, for the most part, are better able to adjust to the changing weather patterns. Plants that originate from a Mediterranean climate such as herbs like lavender, rosemary, sage, and thyme are well-suited to beat the hot and dry weather as well. They are not only valuable for their culinary or medicinal properties, but also make outstanding landscaping specimens.
Following these guidelines will help you better understand where your garden grows and assist you in responding to its changing needs. This will help to ensure a thriving landscape that will bring you seasons of enjoyment. As always, we invite you to speak with our knowledgeable staff to help create or improve your garden.
Right after the New Year is a great time to clean up and sharpen your tools for the gardening season to come. Clean up garden implements by removing caked on soil and mud, sanding off rust, and adding a crisp cutting or digging edge. Pruners, shovels, trowels, and hoes should all be sharpened and oiled so they are ready for the vigorous work approaching in the months ahead. A light coating of motor oil rubbed on to the work surfaces is a popular way to stave off rust. Power tools should also be winterized. If you aren’t removing gasoline over the winter months, be sure to add a stabilizer to your gas mix. Power tools should also be cleaned, sharpened, and oiled before storage.
You will need the following:
- A wire brush or steel wool to get into the tight spots.
- File/sharpener/sharpening stone. Be sure to follow the beveled edge on your blades when sharpening.
- Lubricating oil to lubricate and preserve.
- Rags for clean up through all of the stages.
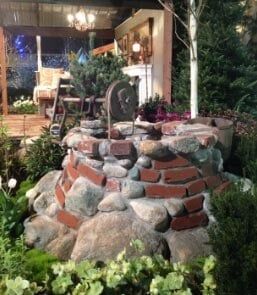

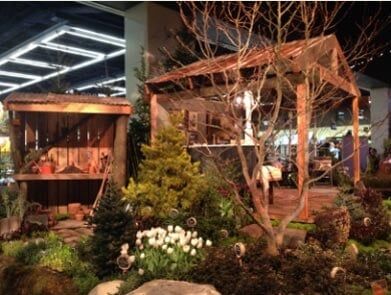
In 2015, McAuliffe’s Valley Nursery had the great opportunity of putting on a display garden at the Northwest Flower and Garden Show. While we have collaborated with other designers in the creation of their display gardens in previous years, this was our first time creating a display garden of our own. Our garden was created to evoke a simpler place and time, a getaway, a woodland retreat . . . where “romance can bloom.” It was constructed of new and reclaimed materials. By using found objects in new ways, we breathe new life into otherwise discarded items. It was created with the desire to inspire others to repurpose the common in uncommon ways, to slightly shift one’s perspective of what is possible, to create a personal getaway.
This semi-woodland retreat was inspired by a vintage romance; a love for finding the hidden but once cherished qualities within the land, and the reclaimed and repurposed elements that make it so endearing. Our garden featured a quaint cabin, potting shed, and landscape that are comprised of new and renewed materials. Unique elements such as 120-year-old reclaimed timbers from a historic barn in Snohomish, nurse logs, river rock, and vintage clinker bricks were utilized. Other repurposed materials were salvaged, such as a concrete building façade sections from the Fox/Emerald Theater and Music Hall, formerly on 7th and Olive in Seattle, which was demolished in 1992. Vintage details such as antique light fixtures, tools, and art were added to evoke a sense of time and place. The hardscape also reflected a vintage feel with an Arts and Crafts style artesian well, pond, and stone pathway and rustic iron pieces were salvaged for the vegetable gardens.
The plant materials were selected to create the impression of a retreat nestled in a mature landscape that was being reimagined for the changing needs of those who inhabit it. In this garden, we used evergreen and deciduous trees and shrubs with unique bark, branching structures, and symmetry with an eye toward winter interest. Our garden featured both native and cultivated plant selections with harmonizing textures, shapes, and colors. We included plant varieties with multi-seasonal appeal and complimentary plant combinations that featured choice perennials, bulbs, and edibles.
The Northwest Flower and Garden Show is hosted annually in February at the Washington State Convention Center in Seattle. It is a wonderful opportunity to be inspired, explore local tradesmen, learn, and mingle with fellow gardeners. We sell tickets here at the nursery every year. Join our Garden Club Newsletter to be informed when they become available early in December. Purchasing your tickets at a local retailer saves you the $1 transaction fee from purchasing them online!
Galanthus ~ Snowdrop – These charming white bell shaped blooms emerge through the coldest winter months, rising through frozen ground and a blanket of snow.
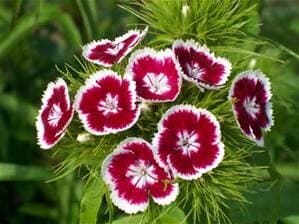
Dianthus ~ Carnation – This sweet flower has been an inspiration for artists through the centuries. It is easy to grow, fragrant, and edible!
Trees ~ Abies (Fir), Ulmus (Elm) and Cupressus (Cypress)
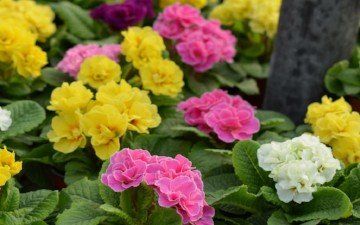
Violet ~ These spring blooming gems are a favorite woodland plant, brightening the shadier corners of your garden. One of our favorites is Viola odorata, a fragrant variety.
Primrose ~ The English Primrose has become a garden staple in recent years and is a sign that spring is just around the corner. There are many varieties of Primroses available, so be sure to look for new varieties to add to your collection this year.
Trees ~ Cupressus (Cypress), Populus (Poplar), Cedrus (Cedar) and Pinus (Pine)
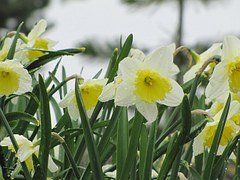
Daffodil ~ Daffodils, Narcissus, Jonquils—however you call them—they are the birth flower for March. A timeless image of spring and a hopeful change in seasons. Few flowers bring as much joy at first sight as the daffodil. Children of all ages wonder how this sleeping beauty emerges after months of rest, from cold soil, often pushing through snow, to warm both our hearts and our soils.
Trees ~ Salix (Weeping Willow), Citrus (Lime), Quercus (Oak) and Corylus (Hazelnut)
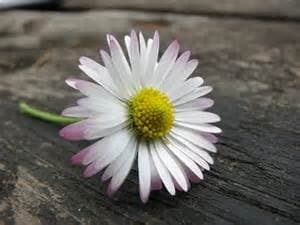
Daisy ~ The daisy, simple and sweet, a perennial garden classic. With so many new introductions to choose from, short to tall, double or single petals. This flower is ideal for cut flower arrangements. You can cut and come again and the long lasting blooms are sure to keep your bouquets full and fresh.
Trees ~ Sorbus (Rowan), Acer (Maple) and Juglans (Walnut)
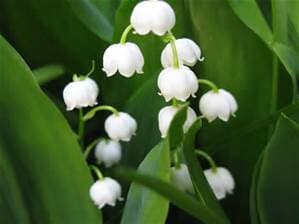
Lily of the Valley ~ The lily of the valley is a perennial that spreads through a fibrous root system, creating a carpet of broad green foliage adorned with sprays of nodding white, bell-shaped blossoms. This dainty woodland beauty is a sign of spring’s promise and its charm and fragrance will linger in your garden and your bouquets.
Trees ~ Populus (Aspen), Aesculus (Chestnut) and Fraxinus (Ash)
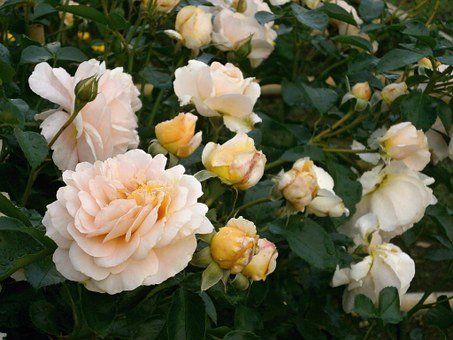
Rose ~ “A rose, by any other name would smell as sweet.” –Shakespeare
This timeless classic is a delight in any garden and is now available in many sizes and bloom colors from carefree landscape roses to voluptuous floribundas and exuberant climbing beauties.
Trees ~ Carpinus (Hornbeam), Ficus (Fig) and Betula (Birch)
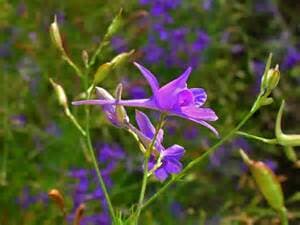
Larkspur ~ Larkspur is a beautiful and carefree perennial that is a delightful addition to mixed borders or cottage style gardens. The charming blue, pink, or white blooms are surrounded in frothy finely cut foliage. It is a great choice for full to partial sun locations.
Trees ~ Abies (Fir), Ulmus (Elm) and Cupressus (Cypress)
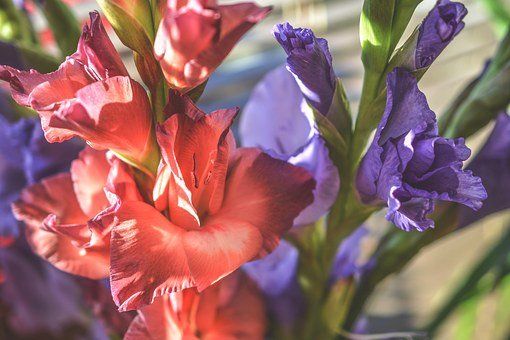
Gladiolus ~ Gladiolus is a statuesque perennial bulb that represents remembrance, calm, and integrity. Available in a wide array of vibrant colors, it is a wonderful addition to a cutting garden or perennial border.
Trees ~ Cupressus (Cypress), Populus (Poplar), Cedrus (Cedar) and Pinus (Pine)
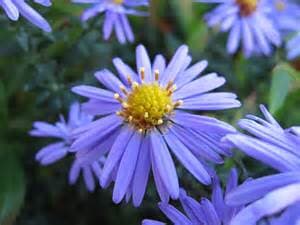
Aster ~ The cheery exuberant aster is symbolic of powerful love and offers a final colorful show in our fall landscape. This beautiful flower is also a great choice for cut flower arrangements.
Trees ~ Salix (Willow), Citrus (Lime) and Corylus (Hazelnut)
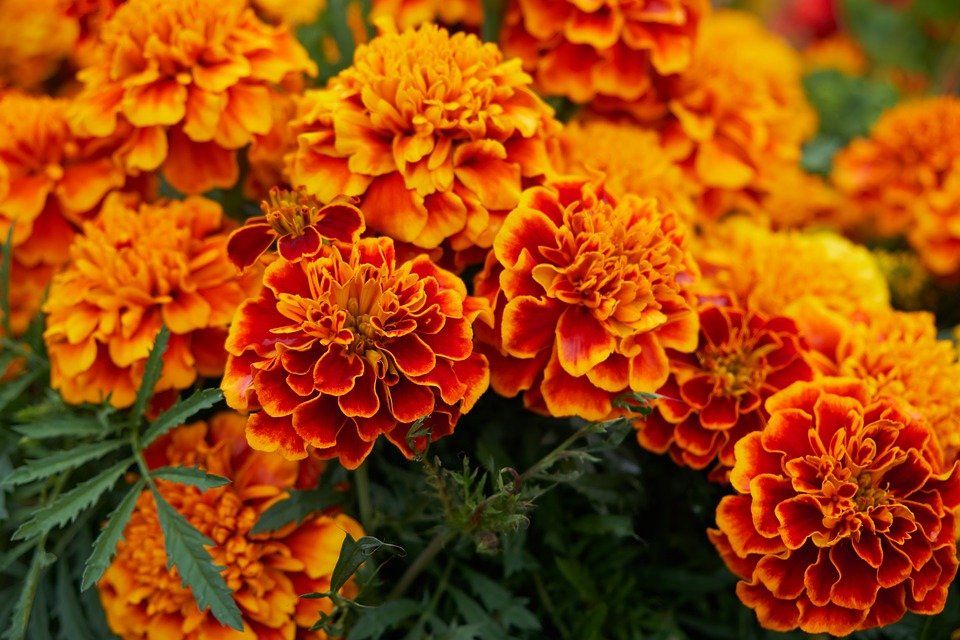
Marigold ~ The vibrant marigold is a symbol of elegance, protection, comfort and healing. This colorful flower is a wonderful addition to edible garden as it is useful at repelling harmful insects and it is edible.
Trees ~ Sorbus (Rowan), (Acer) Maple and Juglans (Walnut)
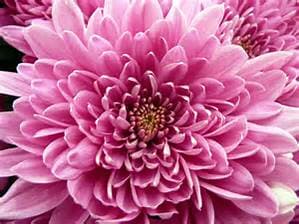
Chrysanthemum ~ Chrysanthemums represent innocence, purity, and love. Available in a variety of colors, they offer beauty at this change of the seasons. They are an excellent choice for container gardening or for a splash of brilliance in the landscape.
Trees ~ Juglans (Walnut), Castanea (Chestnut) and Fraxinus (Ash)
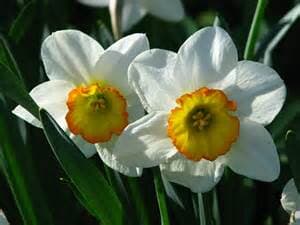
Narcissus ~ This cheery spring staple is said to symbolize respect, modesty, and faithfulness. A hardy bulb and spring blooming beauty it is available in a variety of colors and forms. They are very useful in gardens that welcome wildlife as they are not often browsed by deer and squirrels are not interested in digging them up.
Trees ~ Carpinus (Hornbeam), Ficus (Fig) and Malus (Apple)


Great Plant Picks: www.GreatPlantPicks.org
WSU Master Gardener Extension: www.MasterGardener.wsu.edu
American Conifer Society: www.conifersociety.org
Iseli Nursery: www.IseliNursery.com
